
"When out cycling always turn left. That way, if you get lost simply reverse the procedure to find your way home" - with apologies to Viz top tips
Now that the weather is getting a bit nicer here in the UK I am starting to venture out from the Turbo in my Pain Cave and take my road bike on the actual road. That's sort of a relief, I think I was going a little crazy.
2hrs endurance turbo...https://t.co/CbteUQBgyV pic.twitter.com/X9cWUhTTMi
— Ian Blackburn (@IanBlackburn) 3 March 2018
So it's time to look at some mounts for Apple Watch and here are the ones that I have tried (actually these are the only ones I have found - there is not a large choice currently - an often referenced one the CyClip appears to have never made it into production)
- The Velomounts Apple Watch Mount (Disclaimer: Velomounts provided a free trial for this mount for me to try out, which I'll be returning)
- The Satechi Apple Watch Mount
- The DURAGADGET Black Bicycle Handlebar Mount Kit (though I have a Garmin equivalent which looks identical, but seems to have been discontinued by Garmin)
- The bodged "strap a battery to the top tube with velcro straps mount" which I have "invented" in an attempt to have the watch charge while I'm riding - something I'll need to do for the ride on IronMan Wales. Can someone tell me how to make a Kickstarter project?


But before we get on to looking at them, let's get some background.
Why Mount Apple Watch on your Bike?
The more natural way to use Apple Watch is, of course, on your wrist. That way you get use of the built-in heart rate monitor, you can pick from one of your many straps (to match your lycra), and you simply raise your wrist for it to light up with your data.
But putting the watch on your bars has one big advantage in that you don't have to take your hand off them and twist your wrist to see it, thus instantly making it safer and more useful in an event when you are head down and trying to maintain a pace, HR or power zone. Having said that you are still going to need to wake Apple Watch in some way (see below) until we get an Always On mode (which is only likely with the next version of Apple Watch, maybe in Sept).
While your Watch is mounted on your bike it can still capture all the normal data such as speed, gps route, and heart rate (using an external bluetooth heart rate monitor - see below).
Some Settings you'll Want to Change
If you are going to mount your Watch on your bars you'll want to make these changes to settings
Passcode > Wrist Detection > Turn OFF
If you use a passcode on your watch (which I'd recommend), then you'll want to turn wrist detection off when mounting the watch on your bars. Otherwise, Apple Watch will keep locking itself and you'll have to enter your passcode while cycling - which is really not possible.
Go to settings on the Apple Watch app on iPhone or Apple Watch itself, select Passcode and turn Wrist Detection off. You'll get the following :


So basically you can’t use the heart rate monitor, which is sort of obvious, so you’ll need to get a Bluetooth Heart Rate band instead - see below for some recommendations.
Note that when you turn Wrist Detection off the following also get disabled, so after the ride, you'll want to turn these all back on if you use them:
- Unlock with iPhone (You have to turn this back using iPhone in the Apple Watch app using Settings > Passcode)
- Allow Apple Watch to unlock your Mac (You have to do this on your Mac in System Preferences > Security & Privacy)
Wake Screen Settings
You’ll want to check your wake screen settings. Unfortunately, you can’t have the screen stay on permanently in watchOS4 - primarily because of battery drain, so instead you’ll need to check out the following in the Settings > General > Wake Screen section.
The assumption is that you want to keep quick access to your Workout app screen (whichever app you are using)
- Wake duration. It can be 15 seconds or 70 seconds. If 15 seconds work for you, you’ll get better battery life, and that is fine for me, but you can bump to 70 seconds if you prefer.
- On Screen Wake Show Last App: set to "While in Session" to make sure Apple Watch doesn't go back to the watch screen next time you wake it (note the Watch settings screen actually says on Screen Raise but this is an error - it means "Wake").
- Auto-Launch Audio-Apps: You might want to turn this OFF if you are playing music using a different app so that Apple Watch doesn't jump to the music playing screen when you wake it.
Some Other Things to Consider Before you Ride
Notifications
Depending on what you are doing you may want to turn notifications on or off so you do or don't get interupted by messages and calls. The easiest way to do this is with the Do Not Disturb mode by either swiping up from the clock screen and tapping the crescent moon, or selecting Settings > Do Not Disturb.
Some events (Such as IronMan) do not allow communication devices, because of being coached during a race, but most less strict ones should be fine. I actually really like getting messages of support from family and Apple Watch does this better than any of the competition. It's even possible to reply with a thumbs up or predefined message while on the bike.
Tracking
There are lots of options for your loved ones to track you while you are out on a ride. Strava has beacons, Garmin has live tracking, various apps have their own options, but my wife just likes to use Find Friends - she's familiar with it and it's easy, and if you have an LTE watch tracking automatically switches to it when you are away from iPhone. You don't get a route, or an ETA but it's enough, unless you have a coach that wants to watch your every move and monitor your live data live (which I suspect is not the case).
Brightness and Text Size
You may want to play with these settings to get the best view of the screen for your ride. I typically have max brightness, and have not noticed an impact on battery life so far. It's in Settings > Brightness & Text Size, but you probably could have guessed that.
Which App Should I Use?
That's for another post, but for this one we'll assume you are using the standard Apple Workout app for an Outdoor Cycle. In that case you may want to take a look at the settings for Workout Metrics you want displayed on the watch. You can either show all of them, one at a time using the digital crown to scroll between them or select the ones you want to view for a single screen. Do it all in Settings > Workout > Workout View on the Apple Watch app on iPhone.
Using an Bluetooth Heart Rate Monitor

Normally I'd wear the Wahoo band at the top of my arm under my shirt
If you are going to mount your Apple Watch then it's not on your wrist and you can't use the built-in heart rate monitor. But the good news is you can use a Bluetooth one instead and get better battery life for free.
Any Bluetooth strap will do (be careful not to get one that is only ANT+ which won't work with Apple Watch) I have the following:
- Wahoo Tickr X - the X version isn't needed, the standard Tickr will work just fine.
- Wahoo Tickr FIT - This is a new optical band from Wahoo that can be worn on the arm instead of around the chest. I've just picked one up on Amazon to try. Optical is generally considered less accurate than a chest band, but I think for most purposes and with current technology, there is little to choose between them, and I prefer to wear it on my arm just above the "tan line" than my chest.
- Scosche Rhythm+ - Like the new Wahoo Tickr FIT this is an optical band that you wear on your arm and has proven to be accurate in my experience.
Connecting the Bluetooth Heart Rate Band to Apple Watch
- Put the heart rate band on
- Ensure there is no app on your iPhone or other device that is already connected to the band - this is one of the problems with Bluetooth as a technology, you can generally only have one app connected at a time. If you are struggling with this, try turning Bluetooth off on your phone while you connect the strap to your Apple Watch, then turn it back on again afterwards.
- On Apple Watch, select Settings > Bluetooth and you should see the band listed. Tap on it to pair it to the watch. You can test it is working ok by wearing the band but taking the watch off your wrist and then going to the Heart Rate app and checking you are getting a reading.
Using Apple Watch during the Ride
How do I Wake the Watch?
You can do one of the following (in my order of preference)
- Tap the screen (might not work with some gloves)
- Press the Digital Crown
- Scroll the Digital Crown (if Settings > General > Wake Screen > Wake on Screen Crown Up is on)
Provided you have the settings listed above the Watch will then display your workout app for 15 seconds, just enough time for you to realise you need to go faster.
One of the rumours for Apple Watch Series 4 which should be launched around September (would be so nice if this was before Sept 9th and IronMan Wales) is that it will have a 15% bigger screen, more health sensors, and better battery life. I am hoping better battery life translates to an option for an always on screen.
Switching to Other Apps
If you want to run more than one app, perhaps using Apple Maps for navigation (not ideal but it sort of works), then you can use the side button to switch between them as normal though it is a bit fiddly while cycling and requires using the touch screen which isn't ideal when wearing gloves.
It would be nice if there was a way to switch to an app just by scrolling and pressing the digital crown, but there isn't... though you can double press the digital crown to go back to the last active app.
Using the Mounts
So let's take a look at the mounts which is the point of this post (and I'm already 1800 words in - sorry about that!)
There are the two areas I am concentrating on:
- Fitting and Robustness. Is it easy to fit on the bike, and easy to get the watch into the mount, and is it strong enough to protect the watch on the ride?
- Easy of Use. How easy is it to use while riding or in a triathlon? Can I get to the buttons and swipe the screen? Will it work in transition?


Fitting and Robustness
Taking them one at a time:
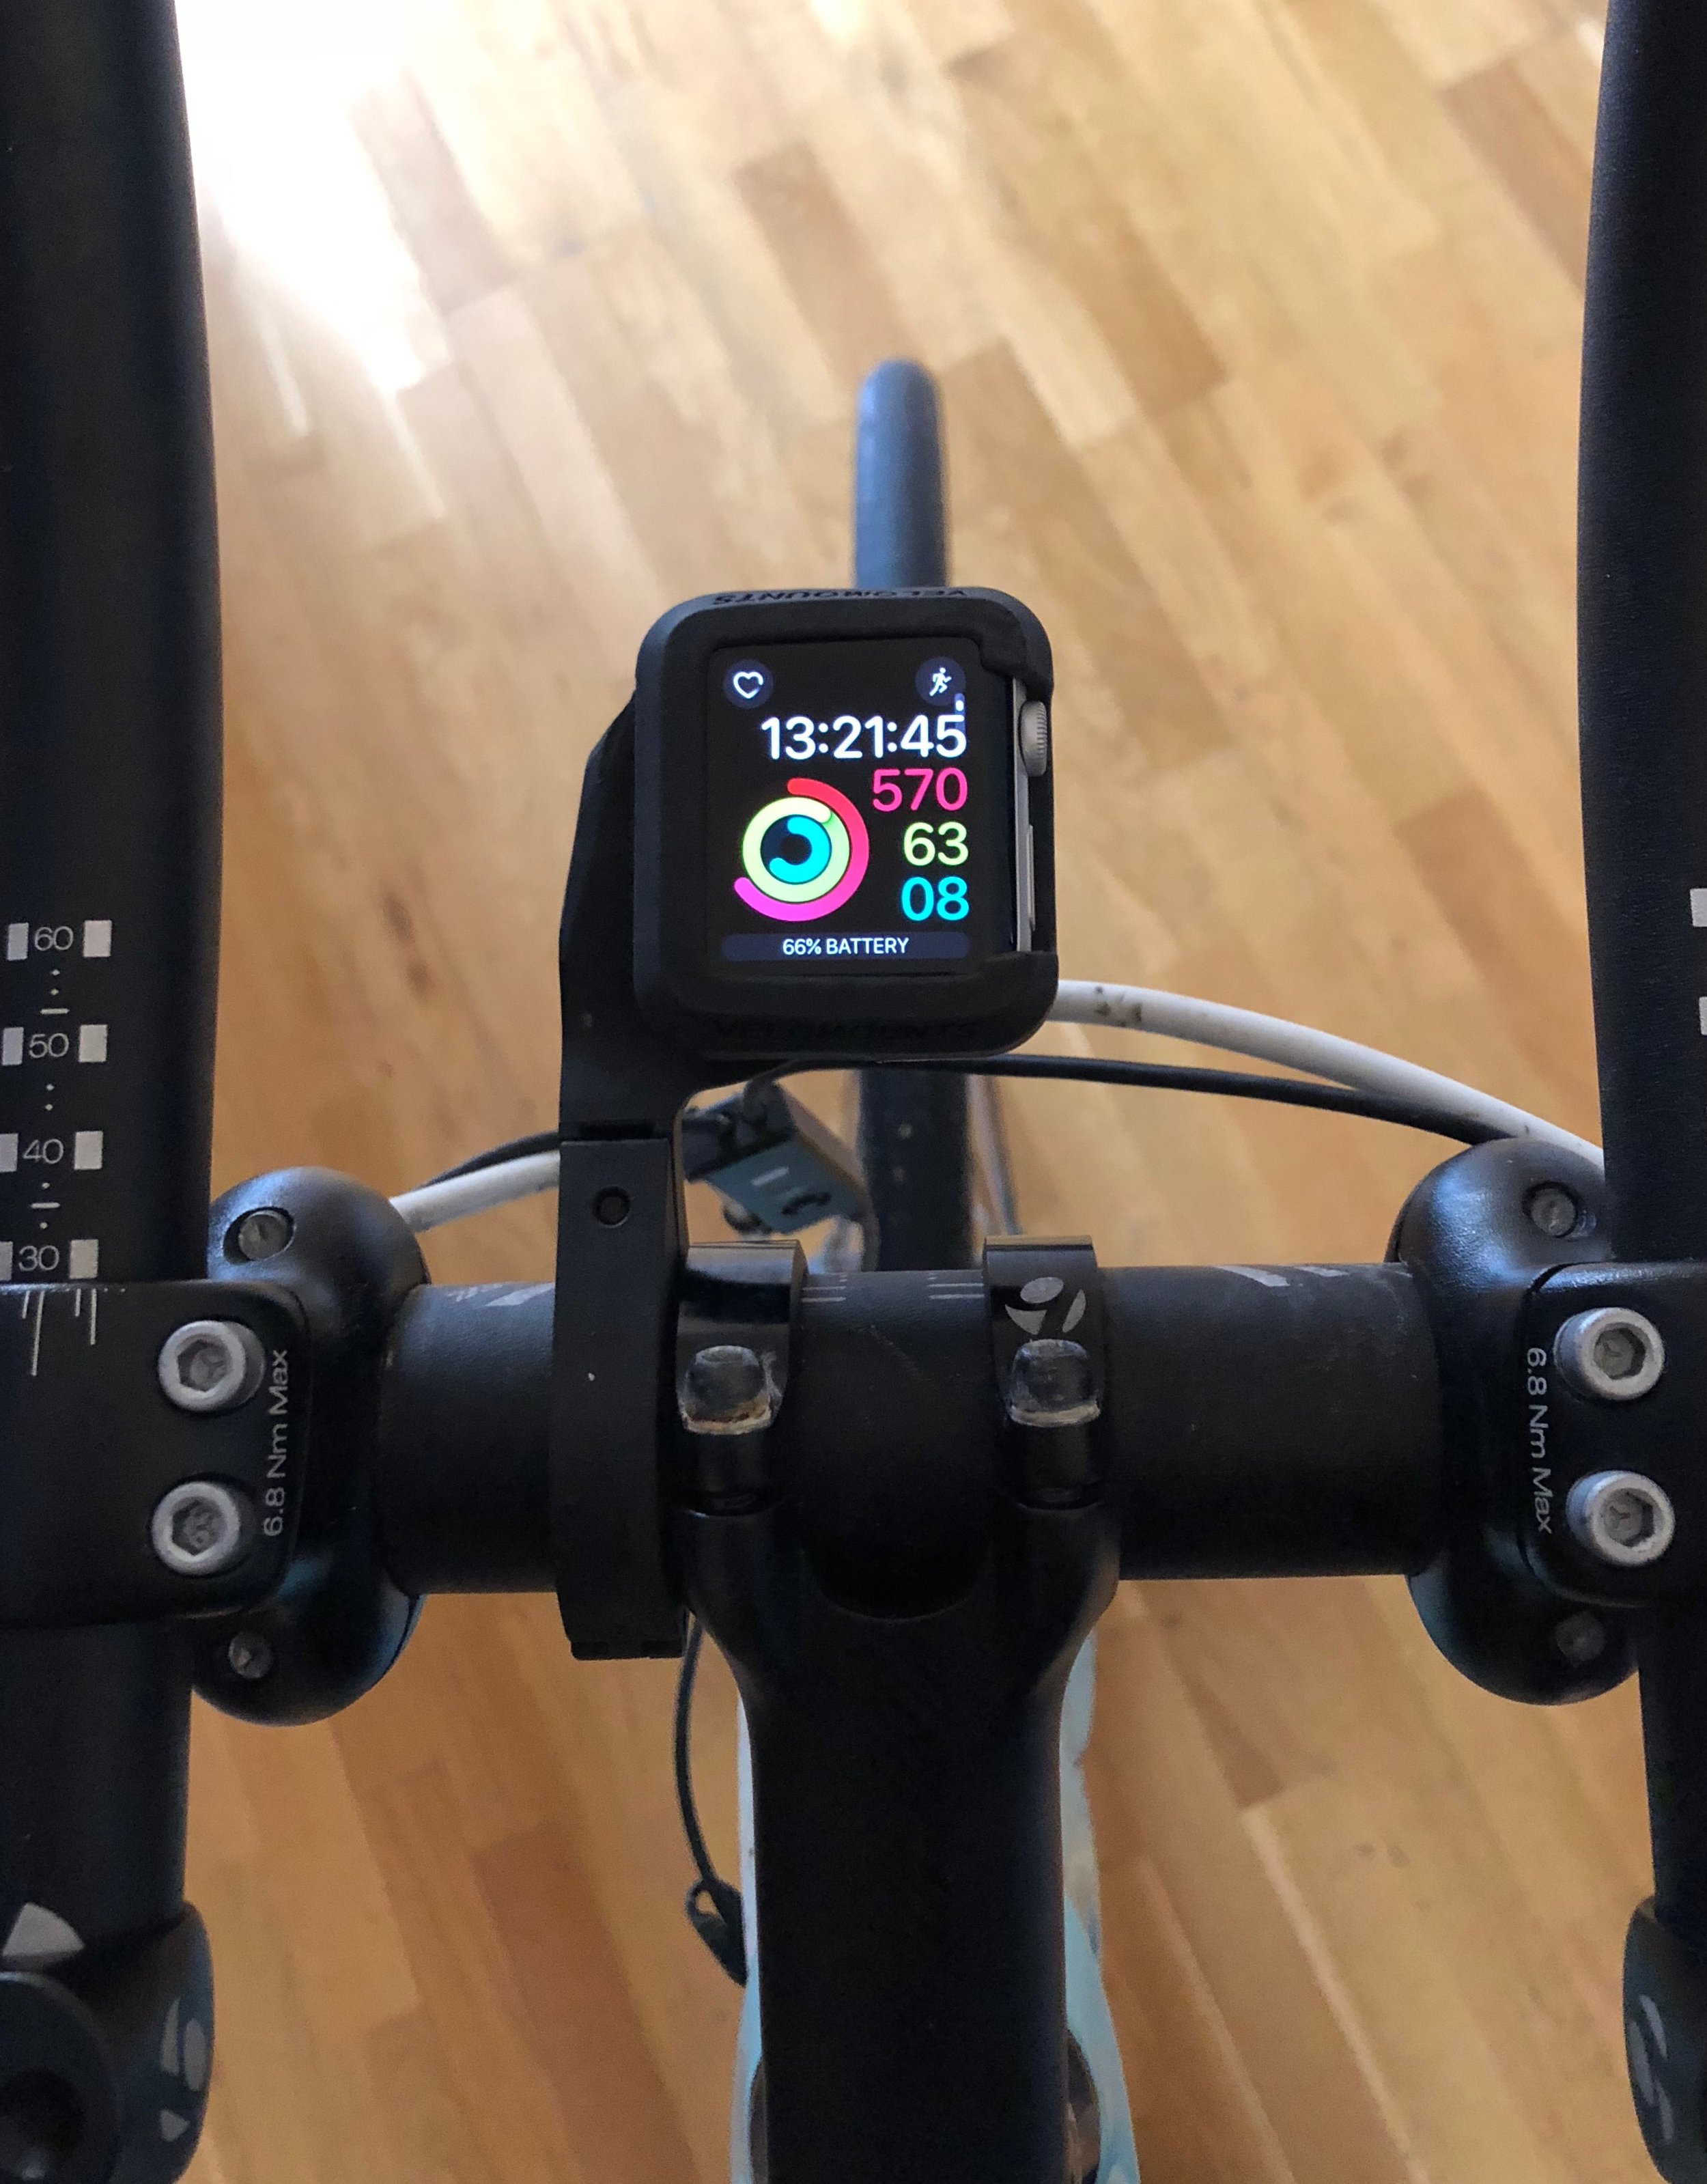
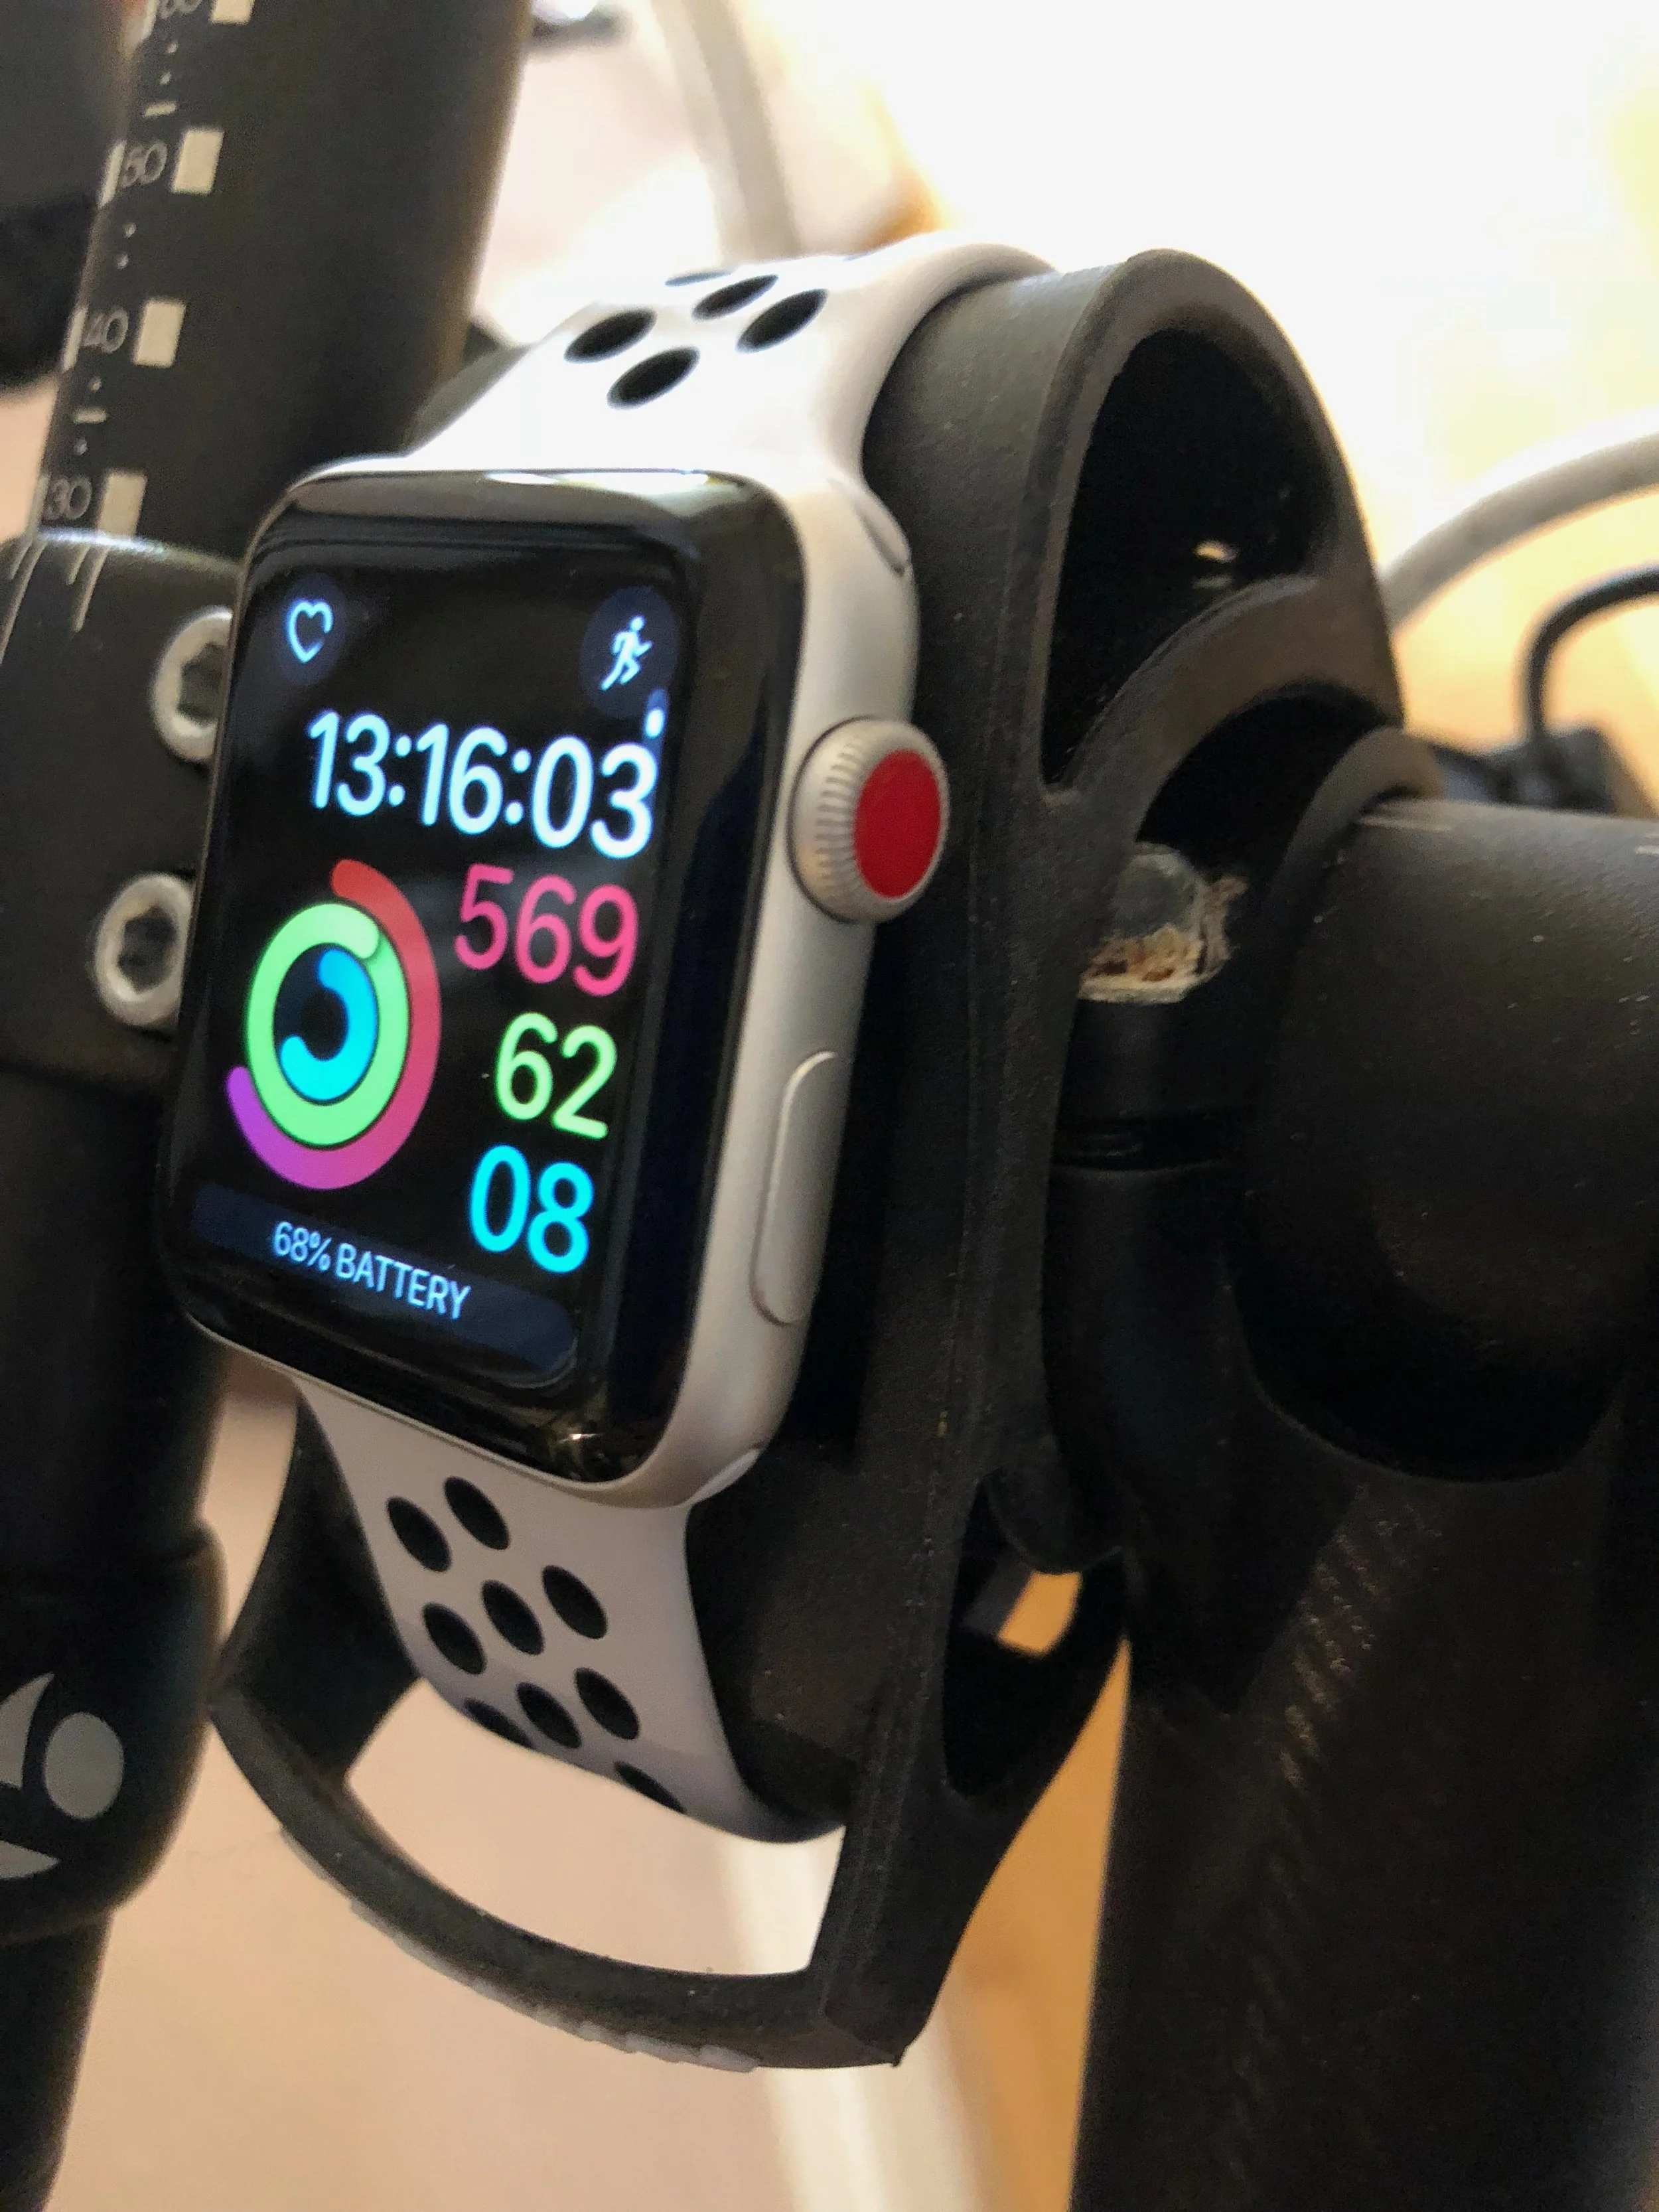
- The Velomounts mount is easily the strongest and most robust. You fix it to your bars securely and tighten with a hex key. The watch (without the band) pushes in, which is a little tricky but once you get the hand of it, quite easy (basically you push and twist - there is a printed guide to show you) and it feels very solid when it's there - no movement at all. There is no way your expensive Apple Watch is falling out of this mount anytime and I feel it would even add reasonable protection in the event of a crash.
- The Satechi is more basic - you push it onto your bars and it grips in place. It worked ok on my road bike, but I'd want to try it on other size bars to be sure (it was too big for my Brompton for example) - it doesn't come with any of those rubber size adapters though you could pick these up elsewhere I expect. The watch (sans band) pushes into the case like the Velomounts one, though it is easier to do though on the flip-side I think it would be more likely to pop out on impact. Overall I like the ease of fitting, but it feels like you Apple Watch is a little vunerable at speed or over bumpy surfaces - I haven't tested in earnest, but it's certainly something I'd bear in mind.
- I had some issues getting the Duragadget to fit in the space between my tri-bars so it wasn't the perfect fit. This mount pushes onto your bars (you can also use the cable ties to make it more secure) and then you wrap your Apple Watch around it and use the watch band to secure. Because of the extra hoop on the mount (not really sure what the point of this is), if you have a sport loop band you will need to take one part off the watch, silde it on to the mount, then reattach to the watch to make it work. However I think that is probably more secure than using a sport band with the press-stud fitting which was a stratch to fit for me, and I would worry could potentially pop-out when going over a bump.
- The incredibly engineered Bodged charging mount consists of this and a couple of these. It works best with a Sport Loop which stretches perfectly over the charger to give a snug fit, and I'm lucky that my top tube is quite flat so this fitted on quite well with a couple of velco straps. It worked great for charging on the go and was easy enough to read, though clearly it's not ideal and could eventually come loose or start to slide. I would love to see a real mount with an option for a charger being attached though.
Fitting and Robustness Winner: Velomounts is clearly the most robust fitting both for the mount onto the bike, and Apple Watch into the mount.


Easy of Use
So how do these work in practice? And are they feasible to use in a transition?
- The Velomounts mount was rock solid in practice and has a nice cutout which means it's easy to reach the digital crown and the side button. It also mounts "out front" which means you have a great view of the screen while riding. I did have some issues swiping the screen which I think may be to do with the raised case on the left of the screen, though it wasn't insurmountable. For transition from the swim in a triathlon you are going to need to take the band off your watch and then push and twist it into the mount for the ride, then remove it (you can push up from the underside to take it out quickly) and refit the band for the run. If you are the sort of triathlete that really looks to maximise your opportunity during transition then this isn't for you because it's going to add some time. However I just timed it (admittedly it's a bit different from doing it in an event) and it was about 15 seconds for each transition with practice and 30 seconds in total won't make much the difference for me over a 14 hour IronMan, so I could live with that (even if it was much longer in the actual event). In fact, that's not a huge difference to using the quick release mount that Garmin offer for some of their watches.
- The Satechi improves over the Velomounts in that it has a cutout on both sides of the mount, meaning swiping the screen is a little easier, and you get easy access to the buttons which worked well. You'll need to follow the same process in transition of removing the band and pushing the watch into the mount, then put the band back on for the run, though it is a little easier to push the watch into this mount that the Velomounts one.
- The Duragadget doesn't cover the watch in any way so usability is as good as if it was on your wrist. There is some lateral movement when you press the buttons unless you can get it really tight which is a bit awkward to do. Getting the watch on it during transition is going to be easier if you use a Sport Band rather than a Sport Loop simply because you won't need to remove the band and you can just slide the band onto the mount as if it was on your wrist, though I worry that in the rush of the transition it would be too easy to not clasp it properly and your Apple Watch would drop to the floor as you cross the transition mat.
- My Bodged mount also doesn't restrict Apple Watch in any way so you can use it as normal, and it felt surprisingly solid in use pressing the buttons, though I'm not sure what that would be like on a long ride. It's also going to be a bit of a PITA during transition with those velcro straps and threading them under the brake cable and making it secure. However, I'll continue to experiment with this because it may be my best option to make Apple Watch last the 14hrs of my IronMan and because it offers the ultimate easy of use benefit of keeping Apple Watch alive and charged!
Ease of Use Winner: I might be biased but I'm giving my Bodged mount an honourable mention because it charges Apple Watch on the go, but overall the Satechi wins it for ease of use in practise and for mounting and unmounting during transition.

Conclusion
Mounting your Apple Watch on your bike is a useful option with some caveats: the lack of an "Always on" mode means you need to wake the watch to see it, and you'll want to explore the settings mentioned above before you set off. You'll need an external heart rate monitor to track heart rate and in triathlons you will also need to consider the impact on transition.
But the benefit is ease of viewing the screen while riding and potentially charging on the go (if someone takes up my bodged example and makes it real)
If you want to mount your Apple Watch then the best option today is the Velomounts one - it looks great, has a great out front mount, and is rock solid in use.
Cheers!
Ian